We all love the idea of getting out into wild spaces and slashing some turns in untouched snow; however, the backcountry experience is a process. And a large portion of that process is dedicated to staying safe.
If you have even a modicum of interest in backcountry skiing you’ve likely heard of the safety trifecta: beacon, shovel, and probe. You must carry these three pieces of equipment at all times in the backcountry, have the education to use them, and be able to access them easily i.e. within 10 seconds. Let’s take a look at these three essentials and how to use them.
This post doesn’t stand in for professional training. This is simply an illustration of how this safety gear functions during a rescue and doesn’t replace professional training.
Beacon
A beacon, or transceiver, is a radio that transmits a continuous signal of your location in the event of an avalanche. Your beacon must be carried on you at all times in the backcountry. It has two modes: send and receive. In the event of an avalanche, skiers can track missing or buried persons by switching their beacons from send to receive mode. A digital display on your beacon will show you the distance and direction of a buried or lost person.
How it works
Imagine you’re skiing a beautiful ridge in the backcountry. It’s the day after a storm cycle has gone through the area and it’s “bluebird” (blue skies, no clouds). Your and your partner’s beacons are in send mode–as they should be. Your partner drops into the fresh powder and releases a slide. You keep an eye on your partner, but they’re unable to ski to safety and get buried in the slide. You have no idea where they are.
Once the slide has settled, with caution, make your way onto the slide path. You switch your beacon from send to receive and start your search. Criss-crossing the entire breadth of the slide, you move from the crown of the slide (top) toward the bottom. As you ski down the avalanche field, your beacon picks up your partners signal and gives you a heading and distance in metres. With caution, you follow your beacon’s heading until you get the lowest reading in meters possible. Now it’s time to take out your probe.
$$$: Mammut Barryvox S
$$: Mammut Barryvox
$$: Pieps DSP Sport Transceiver
Recent research has shown that cellphones can disrupt your beacon’s signal to a detrimental degree. The current findings recommend a minimum of 30cm of distance between your beacon and your cellphone. I recommend turning your phone off and storing it in your pack while in the backcountry.
Probe
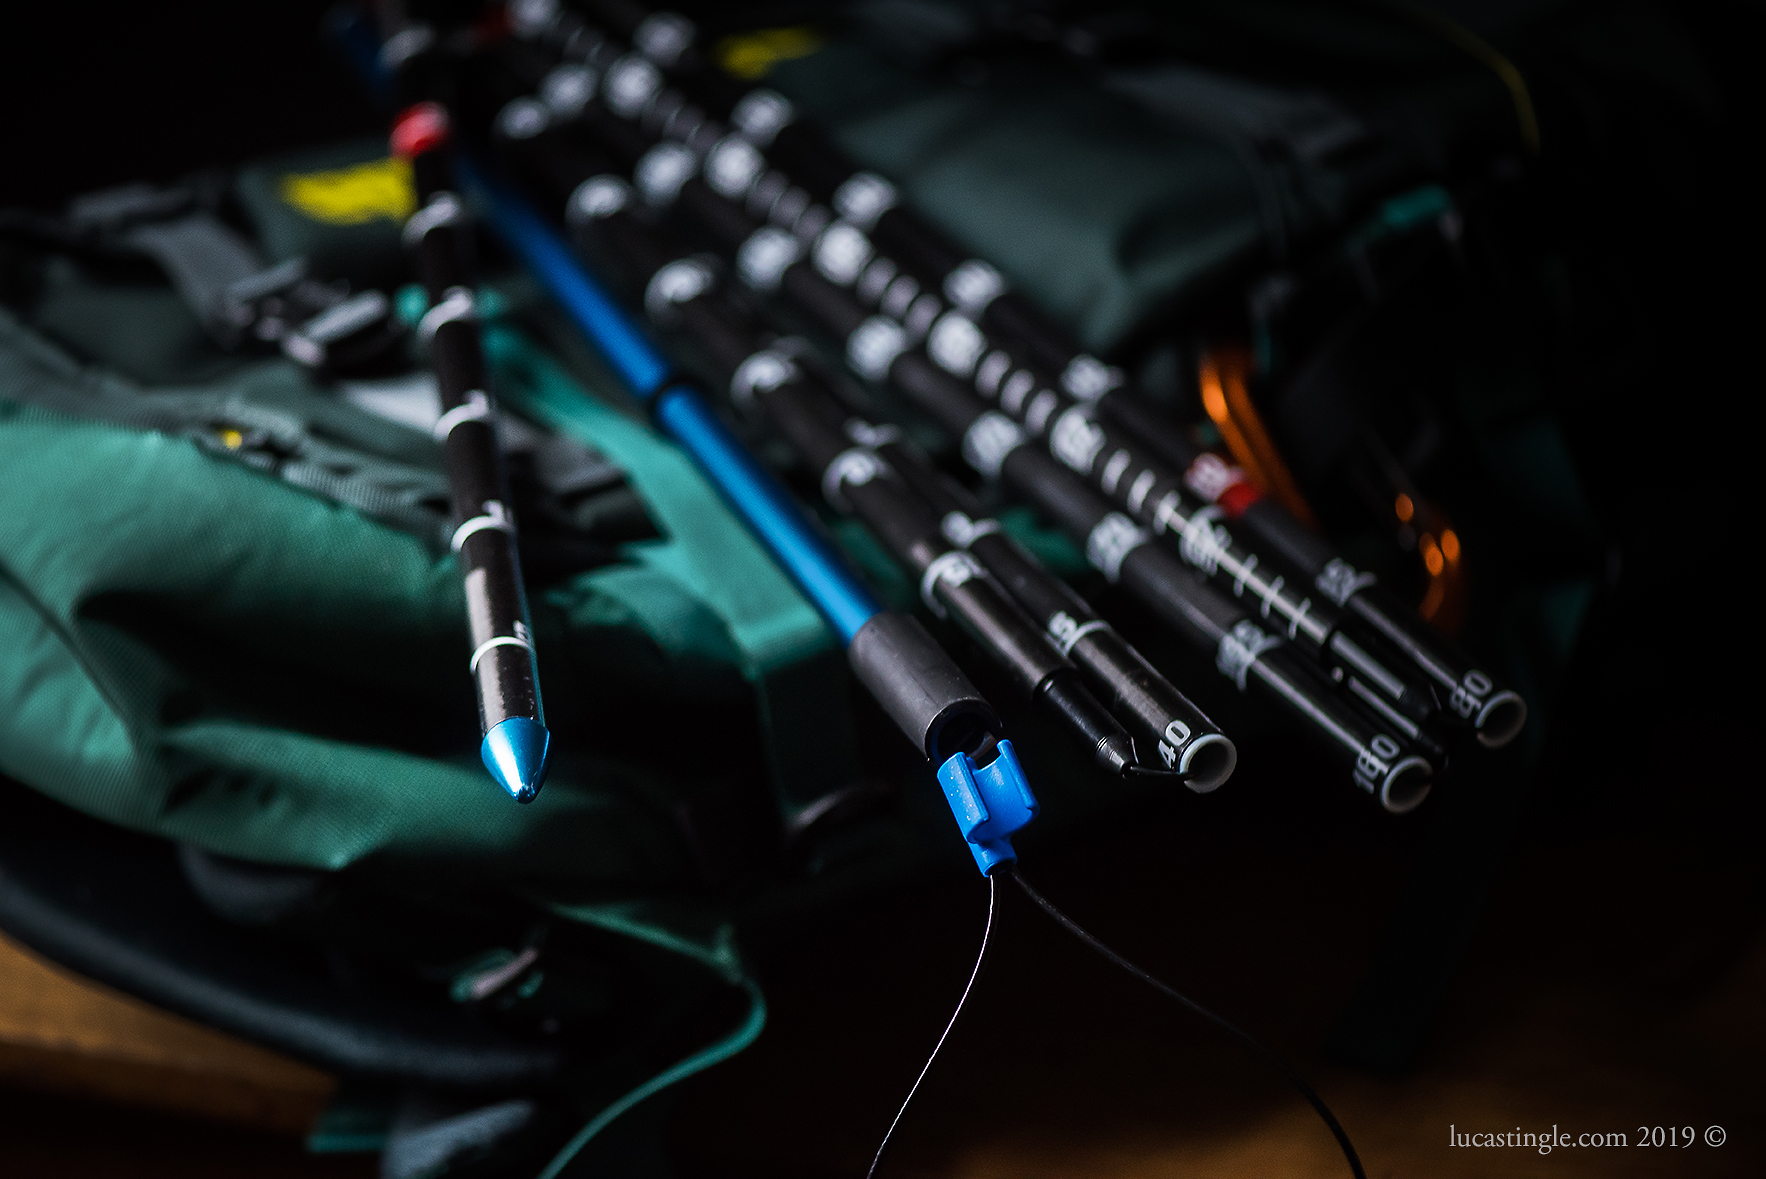
Probes come in various lengths and materials. They are used to probe (search) under the snow surface to find buried persons. Get the longest one you can. They’re constructed like tent poles, but are more rigid. This makes them efficient to put together and keeps them compact for storing in your pack. They’re also labeled for measuring burial depth.
How it works
Once you’ve located your buried partner, use your probe to search under the snow’s surface to more accurately identify their location. Usually, probing is done by making a spiral pattern in the snow, starting from the closest reading your beacon can achieve (lowest number in metres) and moving increasingly outward from that centre point.

$$$: Black Diamond QuickDraw Carbon Probe 320
Shovel
Rescue shovels are collapsible and are designed to fit easily in your pack. They’re most often used for rescue, digging snow pits, and making camp. Get a shovel with a handle that extends as far as possible—this will be more effective in a rescue situation. Choose a shovel with the most squared end. This will make for cleaner work when you dig your snow pits (we’ll talk about snow pits in a later post).
How it works
Once you’ve made a probe strike (identified the buried person) you’ll leave your probe in place (mark the position with your beacon) and start digging.
Snow has a nasty habit of compressing into a near solid form once it has settled after a slide. This is partly due to the weight of the accumulating snow and the friction generated between the snow crystals on the way down. Avalanches can reach speeds in excess of 80 km/h within 5 seconds of the fracture. This incredible speed causes the snow to morph (melt) and settle into a more solid form than when it started.
Luckily, I’ve never had to dig anyone out myself, but my good friend Steve (an ACMG ski guide) explained to me that you can’t shovel the snow after an avalanche. Instead, you basically have to chop blocks of snow out of the debris due to the solidification process. So get a good shovel.
$$: Backcountry Access RS Ext Shovel
$$: Black Diamond Deploy Shovel
$$: Black Diamond Transfer 3 Shovel
Education
These three pieces of gear will certainly give you the tools you need to stay safe, but possessing these tools doesn’t mean you know how to use them. Without education your tools are useless.
Before you head out, you should have proper training (an AST-1 or equivalent) and hire a certified ACMG ski guide to take you out for some practice in the field. Plus, guides always know where the good stashes are.
Beyond that, there are great resources available online, such as Avalanche Canada’s [companion rescue guide]. Check it out to score some bonus points before taking your AST – 1.
Keep the fire burning.
– Lucas

Leave a comment